


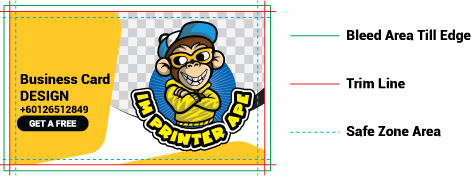
1. No Bleed
The background stops at the trim line, so a white edge may become visible after cutting.

← View all Printing Support Guides
Image Magic Artwork Preparation Guide
Bleed extends colours and images beyond the final trim line so that small cutting movements do not leave unwanted white edges on the finished print.
Product templates and product-specific instructions take priority over these general measurements.
Bleed is the additional artwork extending outside the finished size of a printed product. It is normally removed during trimming and does not make the final product larger.
Bleed is required when a background colour, photograph, pattern or graphic is intended to continue all the way to the edge of the finished print. Without bleed, small cutting movement may reveal a thin white edge.
Extend backgrounds and edge-to-edge images 3 mm beyond the trim line on every side.
This represents the final product size. Artwork outside this line is intended to be trimmed away.
Keep text, logos, QR codes, page numbers and other important content at least 5 mm inside the trim line.

Add 3 mm to the left, right, top and bottom. This adds a total of 6 mm to both the width and height of the finished size.
For example, an A4 finished size is 210 × 297 mm. With 3 mm bleed on every edge, the supplied artwork size becomes 216 × 303 mm.
| Product or size | Finished size | Artwork size with 3 mm bleed |
|---|---|---|
| Business card | 90 × 54 mm | 96 × 60 mm |
| DL | 99 × 210 mm | 105 × 216 mm |
| A6 | 105 × 148 mm | 111 × 154 mm |
| A5 | 148 × 210 mm | 154 × 216 mm |
| A4 | 210 × 297 mm | 216 × 303 mm |
| A3 | 297 × 420 mm | 303 × 426 mm |
Always follow the exact size shown on the selected product page or downloadable template. Some products use different finished dimensions.
Important: Even when the outer edge is white, the file must still match the correct product size. Follow the product template whenever one is supplied.
Thin borders close to the trim line can appear uneven after cutting, especially on double-sided products. A small amount of trimming movement can make one side of the border look thicker than another.
For the most professional result, avoid narrow borders near the edge. When a border is necessary, place it well inside the safe area and make it thick enough that minor trimming movement is less noticeable.
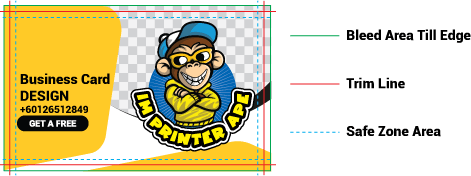
The background stops at the trim line, so a white edge may become visible after cutting.
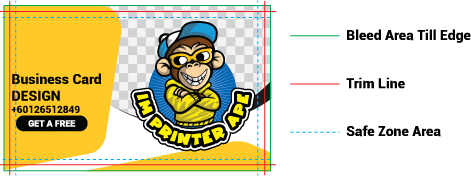
Text, logos or QR codes placed outside the safe area may be trimmed or appear uncomfortably close to the edge.
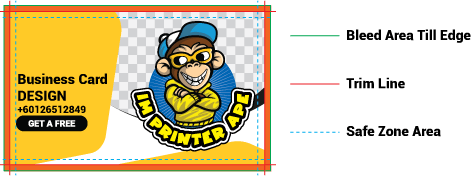
The bleed should continue the same background, image or pattern. A different colour may become visible along the trimmed edge.
Crop marks are generally not required unless the product instructions or our production team specifically requests them.
The 3 mm bleed and 5 mm safe margin are general recommendations for many standard flat printed products. Different requirements may apply to:
Check the product template or read our Supplying Artwork Guide before preparing these products.
Use 3 mm on every edge for most standard products unless the product template specifies another measurement.
No. Bleed is extra artwork outside the finished size. It protects the design when small cutting movement occurs during trimming.
Keep important text, logos and QR codes at least 5 mm inside the trim line unless the product template requires a larger safe area.
Visible bleed may not be necessary when the outer edge is completely white, but the file must still use the correct artwork dimensions and follow the relevant product template.
No. Large-format, packaging, binding, die-cut and special-finishing products may use different requirements.
Send us the product type, finished size, quantity and artwork file. Our team can review the basic setup. Artwork adjustment charges and additional preparation time may apply.